Amazon API Gateway is an incredibly powerful service provided by AWS to create, manage and deploy both REST and WebSocket APIs at any scale. It can handle hundreds of thousands of simultaneous API calls, likewise CORS, authorization control, version management and all the other features you could ask for an API.
On the other hand, AWS Lambda is a processing service for any purpose that runs your code without the need of provisioning or managing any kind of server. There are multiple SDKs provided by Amazon, giving you the freedom to choose the programming languages you feel more comfortable with.
API Gateway can be used without a Lambda function behind it, but both services are usually used together. The API Gateway is responsible for handling the requests whilst the Lambda function handles the data processing, this data being an item to be uploaded to a database, a message to be sent in a notification - pretty much anything you could think of. AWS gives you the best integration of both services available.
In this post, we are going to demonstrate how to integrate a Lambda function to API Gateway methods, acting as the backend for those calls. So let's get started!
Types of integrations
There are two types of integrations you can do to connect your API Gateway method to a Lambda function: Lambda proxy integration and non-proxy integration. So, what is the difference between them?
-
Lambda proxy integration: this integration is the simplest one, where the request is sent raw to the integrated Lambda, including request headers, query-string parameters, URL path variables, payload and API configuration data.
-
Lambda non-proxy integration: this integration requires the developer to map all the possible inputs the end-user could send as the Lambda integration payload, and also format it in a way the function will recognize.
For this tutorial, we are going to use proxy integration, as it is much simpler than non-proxy integration. If you want to read more about the other method, read the API Gateway documentation about custom integration methods.
Creating an API via AWS Console
All the steps in this tutorial are going to be done using the AWS Console, for a better understanding of the concept of the integrations. We highly recommend the usage of AWS SAM when dealing with projects, so you can automate the creation of your resources in the cloud.
So, let's get started with the integration:
- Log in to your AWS account.
- Open the API Gateway console.
- On the REST API card, click "Build". If a popup appears on your screen, click "Ok".
- This screen will be presented. Make sure you select "REST" in the first section and "New API" in the second section. On "Settings", set a name and description for your API. Endpoint Type can be "Regional", for the purpose of this testing API. You can read more about Endpoint Types in the API Gateway documentation.

- Click "Create API". By finishing those steps, your new API will be created, as simple as that. Now, we need to create a Lambda function to later on connect with the newly created API. So on to the next section!
Creating a Lambda function
This Lambda function is also going to be created via AWS Console, using the NodeJS 12.x environment. If you want to know about other programming languages available for AWS Lambda, check out this documentation.
- Open the Lambda management console.
- Click on "Create Function" to create a new Lambda.
- This screen will be presented to you. Select "Author from scratch" to create a basic function. On the "Function Name" input, designate a name for your Lambda function as you desire. In the "Runtime", select NodeJS 12.x.
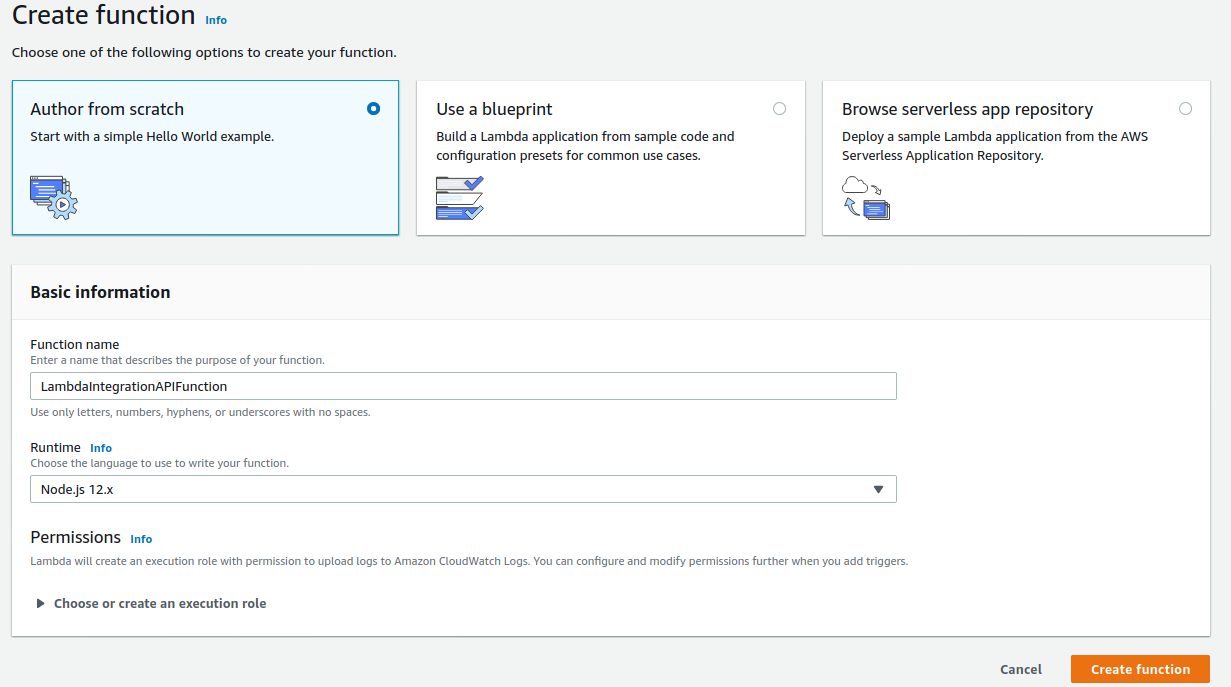
- Click on "Create Function" to create your Lambda. That's it, your Lambda is created. Now, let's take a look at how to link it in your previously created API.
Creating resources and methods and integrating your Lambda function
Now, we are going to create an API resource and then create a method that will be linked to your Lambda, so let's get it going!
- Open your API Gateway list.
- Select the API you previously created in the first part of this tutorial.
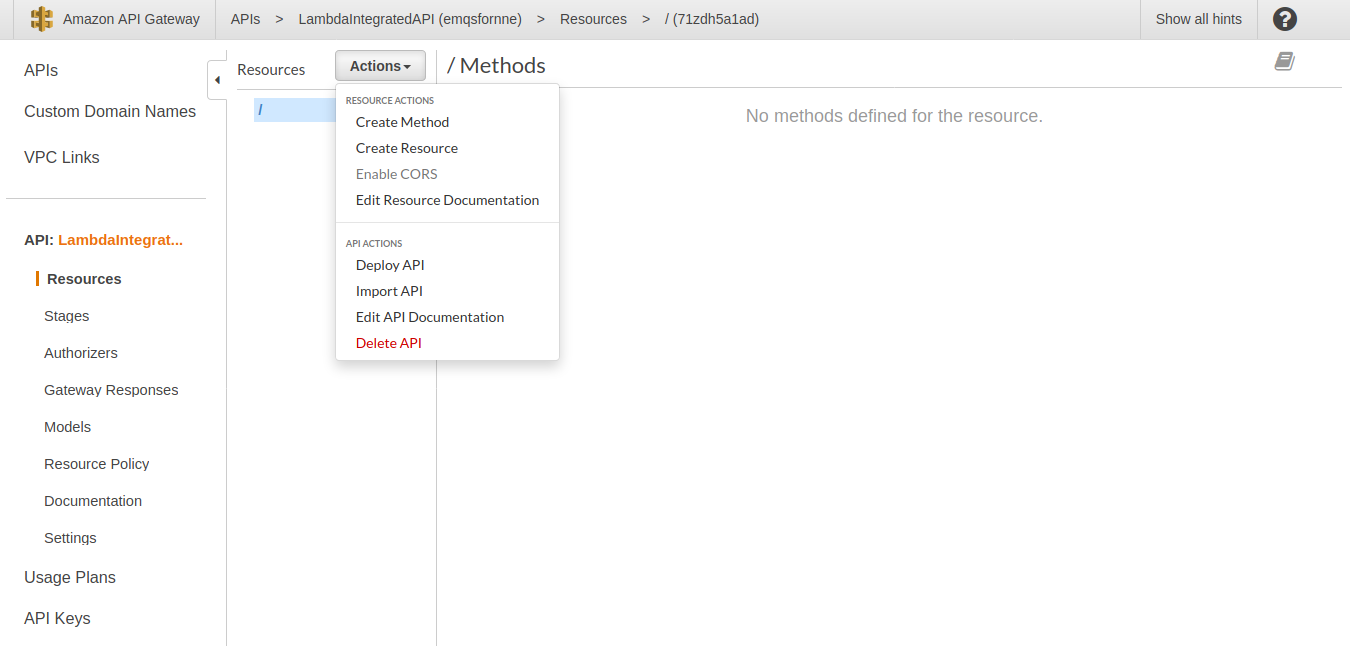
- This API will be empty, so we will have to add some things before linking. First, let's create a resource. Click on "Actions" and then "Create Resource", as shown in the picture below:
-
Set the resource name you want and click "Create Resource".
Your resource is going to be created, and now we will create a method that will be connected to the Lambda function.
-
With the resource you just created highlighted in the list, click on "Actions" once again.
-
Click on "Create Method" in the dropdown.
-
Click on the dropdown that will appear below the resource name you created. If it appears above, click on the x button at the side of the dropdown, click on the resource and create the method again.
-
Select "GET" in the dropdown.
-
At the right side of the dropdown, click on the check button.
-
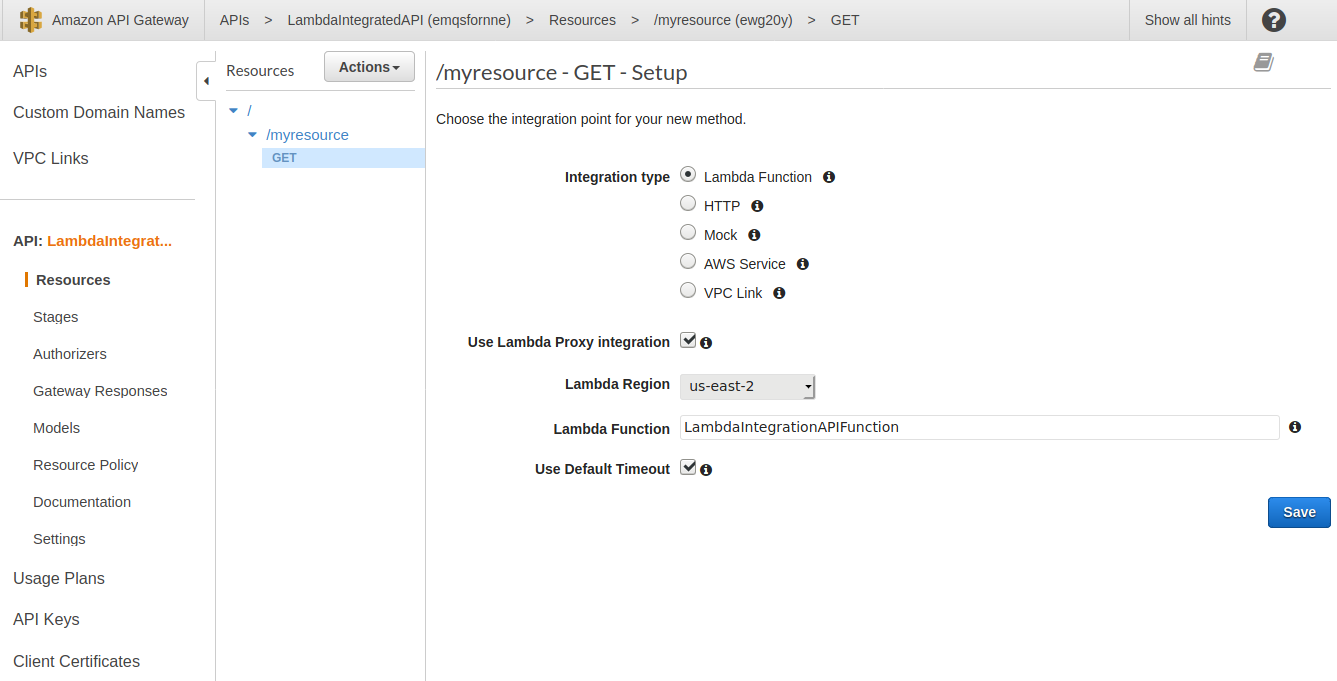
On Integration Type, select "Lambda Function", also check "Use Lambda Proxy Integration". On Lambda Function, type the initials of the Lambda function you previously created, and it should show as an option. Click "Save" after you finish.
- AWS will require you to give the resource permissions to access your Lambda, adding a permission policy for that specific function. Click on "Ok".
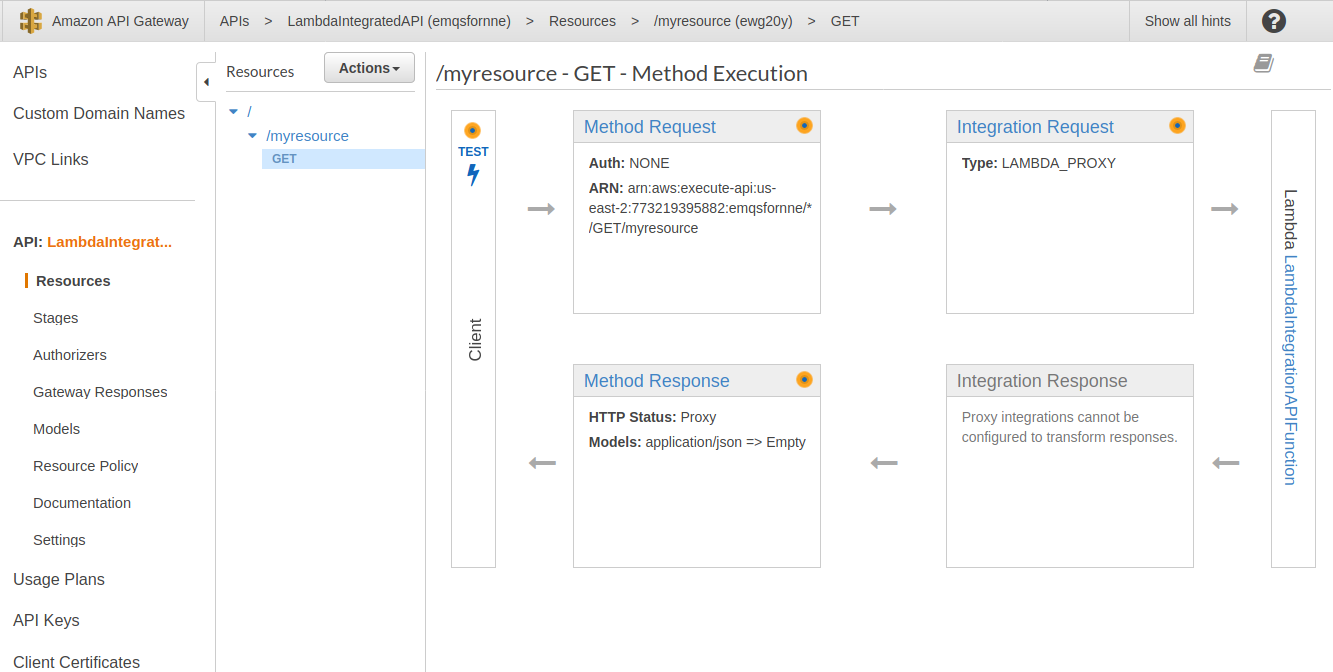
Following those steps will get your method created and linked to your function, and now we will test it and see how your data is coming to your Lambda. So on to the next section!
Testing your method call via API Gateway
Amazon API Gateway provides a testing tool for their APIs, making it much easier to test endpoints, without the necessity of creating test calls on applications like Postman or Insomnia. So let's make good use of this!
- Click on the "GET" method added in your API in the API Gateway console.
- A roadmap of the request will be shown, and at the beginning of the flow there is a "TEST" button, so let's click on it.
-
On the "Query Strings" input, type
param=123. With this, we will create a parameter to send to the Lambda function with the value123. This aligns with the parameter we set in the Lambda before. -
Scroll down and click on "Test".
A response with body
"Lambda successfully connected!"should appear, with headers and the test logs below it. But where is the parameter123we sent?
Lambda logs are available on AWS CloudWatch, and now we will see how to check them!
Checking AWS CloudWatch for Lambda logs
Both of the console.log calls used in the code are going to be there, and in the next steps we are going to show how to get there and see your logs.
- Open the Lambda function you created before.
- Below its name, there are three tabs: "Configuration", "Permissions" and "Monitoring". We are going to click on "Monitoring".
- At the right side, click on the "View Logs in CloudWatch" button. This will open a new tab with a list of logs.
- Click in the blue text of the first one, that represents the latest execution of the Lambda function. If you tested it only once, there will be only one item in the list.
This takes you to the Lambda logs on CloudWatch, where you can see everything that happened to the
Lambda function whilst it ran. It will have printed both the event object and the param
parameter we passed via query string in the test call of the API. You can also see the time the
Lambda took to run, the billed duration, the memory used and much more. It is a helpful tool to
debug your AWS resources when some failure occurs.
We hope this guide helps you understand the integration of those incredible services that are API Gateway and Lambda, and stay tuned for more content in the near future.